
Plum Jam Recipe (No Peel, No Pectin!)

This post may contain affiliate links. Read my disclosure policy.
We’re on a canning spree this week. The air is crisp and the mornings are cool. We’re surrounded by a fiery array of leaves that rustle in the warm afternoon breeze. Fall is in the air and canning just feels right this time of year.
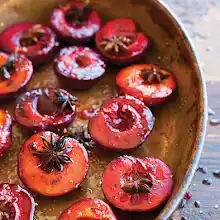
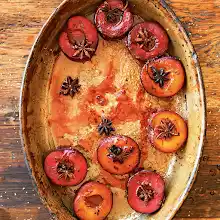
I could eat this plum jam by the spoonful; paired with a hot mug of tea (I’m totally day dreaming here)… Our tiny plum tree overproduces the most amazing little plums every year. I wish I could name this variety; anyone recognize these little beauties?
This recipe is really a cross between plum jam and plum preserves. It still has some of it’s preserve-like plum chunks, but it’s nice and thick and spreads beautifully. It’s awesome paired with breakfast pancakes or crepes. Oh and this would make the sweetest Christmas gift!
POPULAR RIGHT NOW

Home Canning Tools:
- 8 pint-sized jars with lids. I purchased them at Walmart.
- Large Stock Pot (20Qt+) with Rack (or purchase a canner)
- Jar lifter to safely transfer the jars
How to Make Plum Jam:
Cooking the Preserves:
1. Cut 12 lbs of plums in half, pit them and place in a large mixing bowl. Drizzle well with 4 1/2 cups sugar. Using a large spoon, stir plums with sugar until all are coated. If your plums are overripe or already very sweet, you may only need 4 cups of sugar total. You can add more sugar to taste while its cooking. Let plums sit at room temp with the sugar for about 1 hour, or until sugar is somewhat dissolved.


2. Transfer plums/sugar mixture in to a large cooking pot. Place it on the stove uncovered and bring to a boil, stirring occasionally. Make sure if you see a light boil to stir because the whole pot may not be boiling, just the center. If it stops boiling after you stir it, continue boiling until everything is uniformly bubbling, then simmer for 10 minutes and turn off the heat. Let the pot stand uncovered until it is just warm to the touch or reaches room temp.

3. As soon as it cools, repeat step 2 the same way – simmering 10 minutes. You will bring it to a simmer a total of 4 times, stirring to prevent scorching the bottom. This is why it takes 2 days to make. It’s really easy though and so worthwhile! There’s no “set” waiting time between boilings. If 2 days doesn’t work for you, by all means, take 3 days. Preserves have plenty of sugar so they won’t spoil at room temp if you leave it on the counter overnight. If you want the preserves to have an even thicker consistency, you can boil it 5-6 times if you wish.
(Note: the fourth time you boil, bring it to a boil over a little lower heat and stir a few extra times to prevent scorching. Also, it thickens more as it cools. If using a different type of plum, I suggest adding sugar to taste in case they are more tart)
4. The last time you bring it to a boil you will want to transfer it to sterilized jars while it’s boiling hot.
To sterilize the jars:
1. Start by washing your jars and lids with warm water and soap then let them dry in the oven at 215 for about 20 min or until completely dry. Boil the lids 5 min.

2. Transfer your boiling hot jam to the jars using a glass measuring cup and a funnel (least messy method) leaving about 1/2″ space.
3. Screw the lids on enough to keep a tight seal in place but don’t over-tighten them since air bubbles need to be able to escape.
Current Canning Guidelines:
Get up to date on the most recent canning guidelines here. It’s a great resource to answer frequently asked canning questions. Current guidelines recommend the following process (instead of oven canning):
- Place packed cans into the canning pot and cover with 1-2 inches of water. Bring to a boil and process 15 minutes.
- Remove from the pot and leave at room temperature undisturbed for 12-24 hours. You may hear a pop when the jars fully seal.
- After 24 hours, check that the seal has formed by pushing down on the center of the lid – it should not move at all. If the seal does not form, refrigerate jam and enjoy within 3 months.

Now don’t you want to curl up with a jar of that?

Plum Jam Recipe (No Peel, No Pectin!)

Ingredients
- 12 lbs sweet ripe plums, rinsed
- 4 1/2 cups white sugar
- 8 pint-sized jars with lids.
Instructions
Place pitted and halved plums into the mixing bowl & drizzle with 4 1/2 cups of sugar. Stir plums until all coated with sugar. Let them sit for 1 hour then transfer the mixture into a large cooking pot.
Bring it to a boil uncovered, stirring occasionally. Boil until the mixture is bubbling uniformly. Simmer for 10 minutes then turn off the heat. Cool to room temperature.
Repeat step 2 a total of FOUR times. Last time bringing it to a boil at the lower temperature, stirring frequently to prevent scorching.
To Sterilize Your Jars:
- Start by washing your jars and lids with warm water and soap then let them dry in the oven at 215 for about 20 min or until completely dry. Boil the lids 5 min.
Filling and processing your jam:
- Transfer your boiling hot jam to the jars using a glass measuring cup and a funnel (least messy method) leaving about 1/2″ space.
Screw the lids on enough to keep a tight seal in place but don’t over-tighten them since air bubbles need to be able to escape.
Place packed cans into the canning pot and cover with 1-2 inches of water. Bring to a boil and process 15 minutes. Remove from the pot and leave at room temperature undisturbed for 12-24 hours. You may hear a pop when the jars fully seal. After 24 hours, check that the seal has formed by pushing down on the center of the lid – it should not move at all. If the seal does not form, refrigerate jam and enjoy within 3 months.
Recipe updated in 2019 to reflect new canning standards. Previously we used the oven method: screw the lids on enough to keep a tight seal in place but don’t over-tighten them since air bubbles need to be able to escape and place in the oven at 350˚F for 15 min then carefully remove from oven, flip upside down and let cool to room temperature.
Signs of Spoiled Canned Food:
With any type of canning, we follow this advice: “When in doubt, throw it out”
Discard and do not eat or taste any canned food if you notice any of the following:
- the jar is leaking, bulging, or swollen
- the jar looks damaged, cracked, or abnormal
- the jar spurts foam or liquid upon opening
- the canned food is discolored, moldy, mushy, slimy, or smells bad

Frozen Plums


Discover more from ReviewFitHealth.com
Subscribe to get the latest posts sent to your email.